
Build your club's website one page at a time, right where members read it. You work on a draft, and nobody sees your changes until you publish them.
Why use it
Give members one place to find out what the club does, when it meets and how to join.
Live blocks such as Calendar, Files and Newsletter archive fill themselves from the rest of LongTable, so nobody has to retype dates or re-upload documents.
Drafts let you get a page right before anyone sees it. Preview shows it on a phone and a computer first, and Page history lets you go back if a change goes wrong.
Start each section of a page with Heading 2. The page adds room above it, so readers see where one topic ends and the next begins. Use Heading 4 for a small heading inside a section.
Create a page
Open your home page, or the page your new page should sit under.
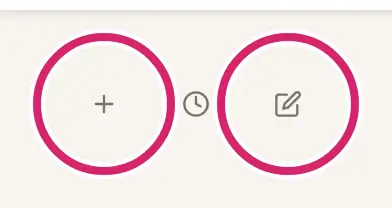
Select Add page, the plus sign in the page's top-right corner.
Enter a Name.
Under Where it goes in the menu, choose where the page sits. Top level of the menu is selected to start. The other choice, Under and the name of the page you opened, makes it a sub-page of that page, and its web address starts with that page's. Opened from your home page, the page always goes at the top level. You can move a page in the menu later.
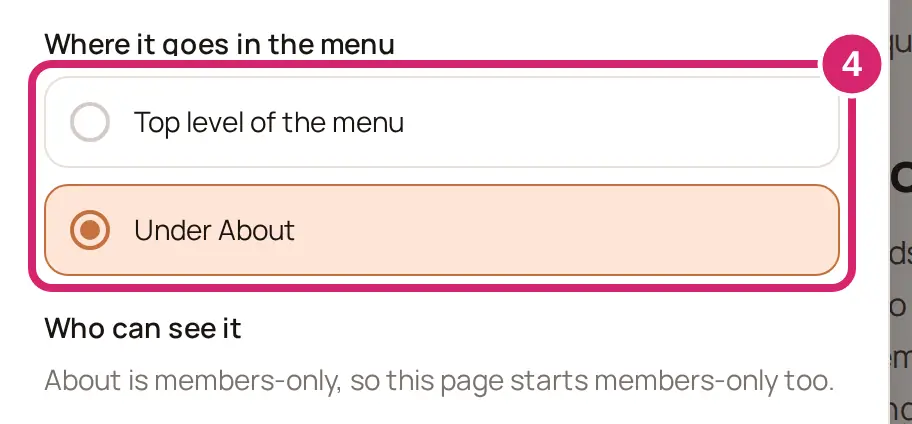
If the page you opened is members-only, the form says so under Who can see it, and the new page starts members-only too.
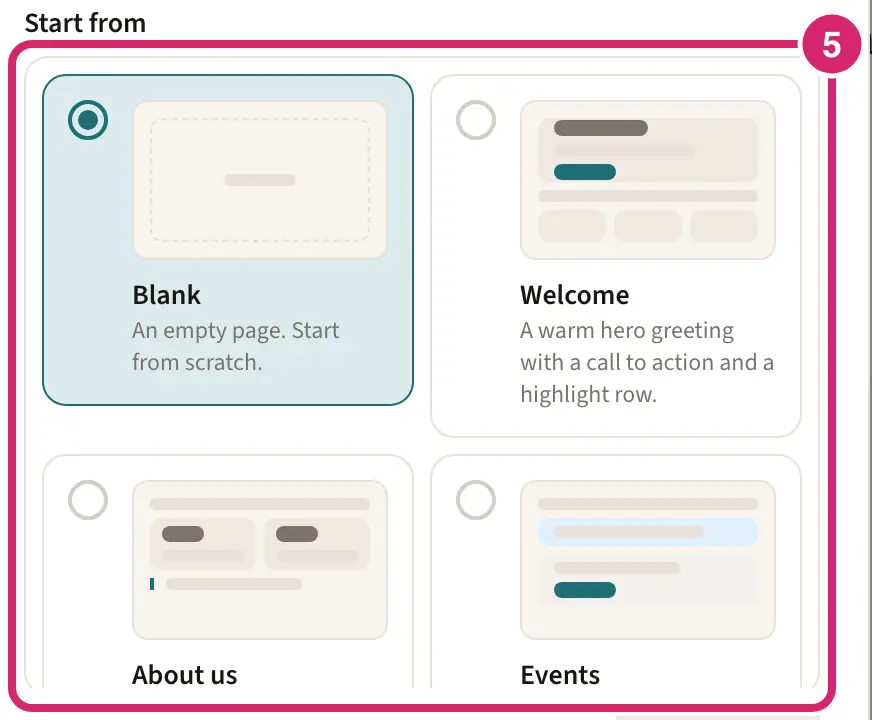
Under Start from, pick a template: Blank, Welcome, About us, Events, Join us, Committee, FAQ, Sponsors, Gallery, Volunteer, Contact, Schedule, Teams, Documents, Services or Get involved. Scroll the list to see them all. Join us is offered only on a plan with a public site.
Start from a template, or from a blank page?
Blank: choose it when you know what the page needs, or it will hold mostly one live block, such as a page that's just your calendar or your files. You add every block yourself.
Any other template: choose one when you'd rather edit than design, such as for your club's first few pages, a page about your committee, or a list of questions people ask. The page starts laid out, with headings, sample words, places for photos and buttons for you to replace.
Everything a template puts on the page is a sample: its words, its numbers, its photo places, the contact details on Contact, and where its buttons lead. Replace every one before you publish, or members will read them as your club’s own. While your club takes requests to join, Join us holds the Join request form, and the main button on Welcome goes to your club’s join page. You can start over from another template later (below).
Select Create draft. On a computer or tablet, the new page opens in the editor.
Until you publish it, the page is a draft. Only people who can edit pages see it in your menu, and members don't see the page at all. You choose who can see it, Members or Public, when you publish it for the first time (below).
Edit a page
Open the page and select Edit page, the pencil in its top-right corner.
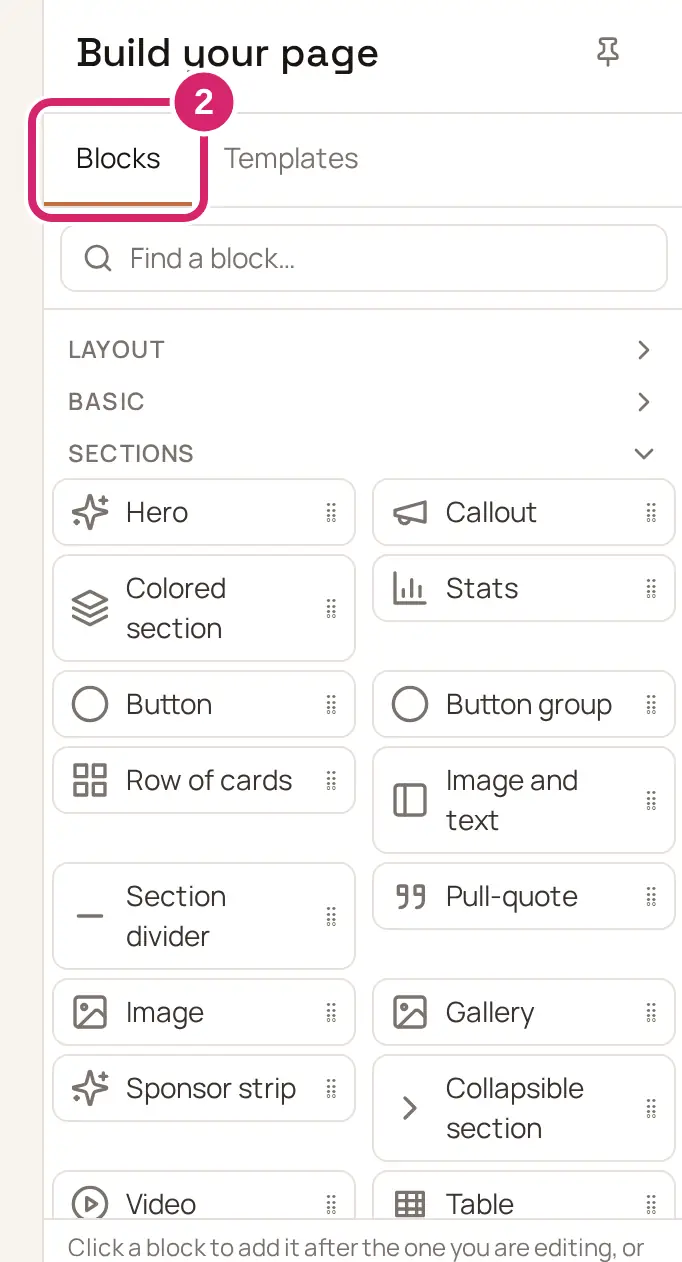
In the Build your page panel, open Blocks. Click a block to add it after the one you are editing, or drag it to the exact place you want it. Clicking a text style, such as Text, a heading or a list, changes the line you are on.
Type straight onto the page. To change a block's settings, select the block and use the panel.
Changed something by mistake? Select Undo, the curved arrow at the top of the editor, or press Ctrl+Z (Command+Z on a Mac). Redo brings the change back, or press Ctrl+Shift+Z (Command+Shift+Z on a Mac).
Select Preview to check the page before it goes live. Preview shows your draft as it would publish:
Desktop, Tablet and Phone show the page at the width of each screen. Light and Dark show it in each look.
As member and As visitor show what signed-in members and visitors each get. As a visitor, blocks only members can see are hidden, and a note says how many.
If a template's sample photo is still on the page, a note says readers won't see it. Replace it with your own photo.
Select Editing to go back to the editor.
Select Publish. We list what's changing, and say who will see it. If anything looks unfinished, such as a link that goes nowhere, an empty block or a photo with no description, we list that too, with Show beside each one. You can still publish.
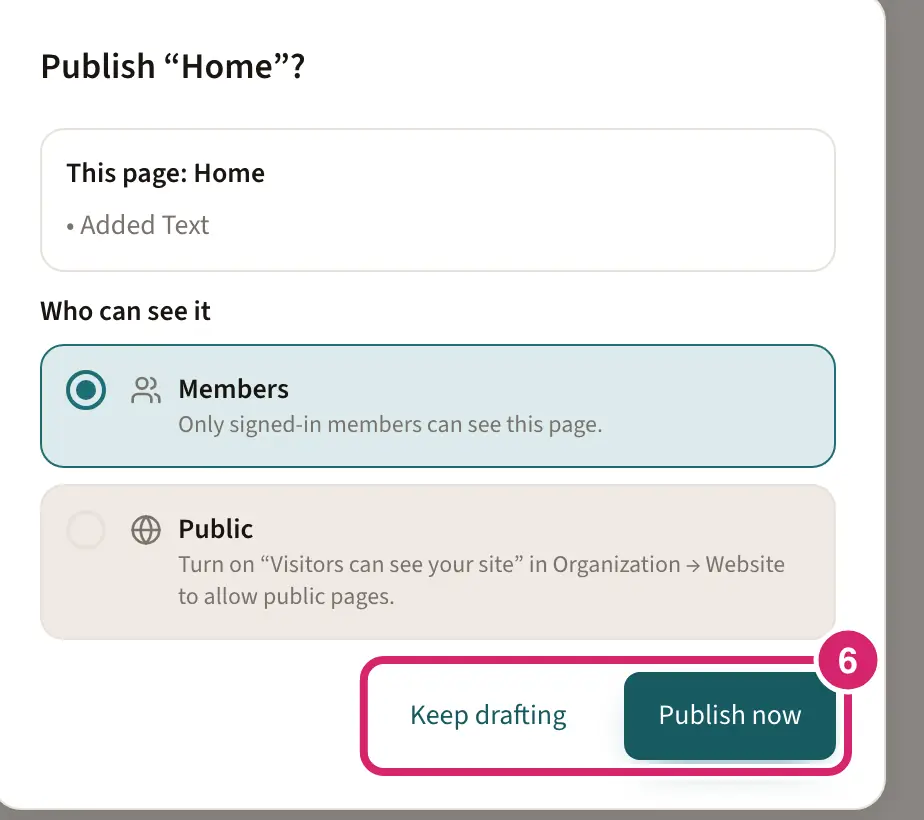
Put it live now, or keep working on it?
Publish now: choose it when the page is ready for its readers. Everyone who can see the page gets the new version at once: members, or anyone at all on a public page.
Keep drafting: choose it when you're not finished, or you'd like someone to look it over first. Your changes stay in the draft, which only people who can edit pages can see.
Your changes save to the draft as you work. The label beside the page's title says where it stands, such as Saving…, Draft · saved, 2 unpublished changes or Published. Edit pages on a computer or tablet. On a phone you can add pages, but the editor doesn't open, and the page says Editing a page needs a wider screen. Open this page on a computer or tablet to edit it.
Decide who sees a page
A page is for your members, for everyone, or for certain groups of members. You choose the first time you publish the page. After that, you change it in Page settings, where a change takes effect straight away, without publishing.
Publish a new page for the first time. The publish card asks Who can see it. (For a page that is already published, select Edit page, then open More options › Page settings and use Page visibility.)
Choose Members or Public. Members is selected to start, except on a page made from the Join us template: while visitors can see your site, it starts on Public and says Public is suggested because this page is for people who aren’t members yet. You can still choose Members.
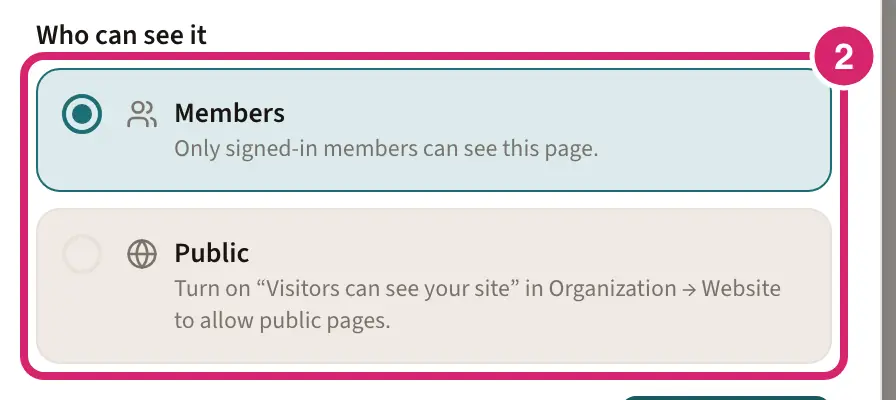
Who is this page for?
Members: choose it for anything meant for your own people, such as meeting minutes, the volunteer rota or members' contact details. Only signed-in members see it.
Public: choose it for pages that help people find and join you: what you do, when you meet, how to join. Anyone can see it, signed in or not. The publish button then reads Publish and make public.
Members, narrowed with Restrict to groups in Page settings: choose it for pages only some members need, such as the board's papers or a page for coaches (next step).
Not sure? Choose Members. You can make the page public later, and nothing reaches visitors by mistake. Public is grayed out, with the reason under it, when it can't be chosen yet:
Add content to this page to make it public. The page is empty. Add something and publish again.
Publish this page first to make it public. You opened Page settings on a page that has never been published. Publish it first, and choose Public as you do.
Turn on “Visitors can see your site” in Club → Website to allow public pages. Nobody outside the club can see your site yet. Make your site public shows how.
Public website access starts on the Basic plan. Member-only pages stay available on your current plan. Your plan includes members-only pages only.
Turn on visitor access in Settings to make this page public. You are publishing a Join us page while nobody outside the club can see your site. Make your site public shows how.
You can switch at any time in Page settings. Making a page members-only also makes its public sub-pages members-only, and making it public also makes its members-only parent pages public; either way, we list those pages and ask you first. Make your site public explains what visitors see.
To show a members' page to certain groups only, open Page settings and select each group under Restrict to groups. It's hidden while Public is chosen.
Select Done.
Members outside those groups don't see the page, in the menu or anywhere else. People who can edit pages always see it. To open the page to every member again, unselect all the groups.
Change a page's name and other settings
Change the title at the top of the editor. A new title goes live when you publish the page, with the rest of your draft. Everything else is in More options › Page settings.
Give the page a shorter Menu label, or turn off Show page title to hide the title at the top of the page. These go live when you publish, too.
Change the page's Web address: the last part of its address, in lowercase letters, numbers and hyphens. The new address goes live when you publish, and the old one leads to it, so links people saved keep working. Your home page's address can't be changed.
Under Search and sharing, set the Search title, Search description and Sharing image. These decide how the page looks in search results and when someone shares a link to it. They take effect straight away, without publishing. A line under Sharing image says what shared links show now, such as the image you chose, the page’s first photo or your club’s logo. Search and sharing needs the Plus plan; below Plus, a Search engine optimization (SEO) upgrade card takes its place.
Edit a page at the same time as someone else
Two people can have the same page open in the editor. While someone else has it open, a note at the top says so, such as Pat is also editing this page. If they save first, your next change isn't saved yet, and the editor says who saved first. Nothing is lost: select Load the latest version to get their version, and your own changes stay on this device. Select View my changes to look at them, then Use my changes to bring them back, or Delete my copy if you don't need them. To avoid this, agree who's editing a page before you start.
Start over from a template
In the editor, open Templates in the Build your page panel.
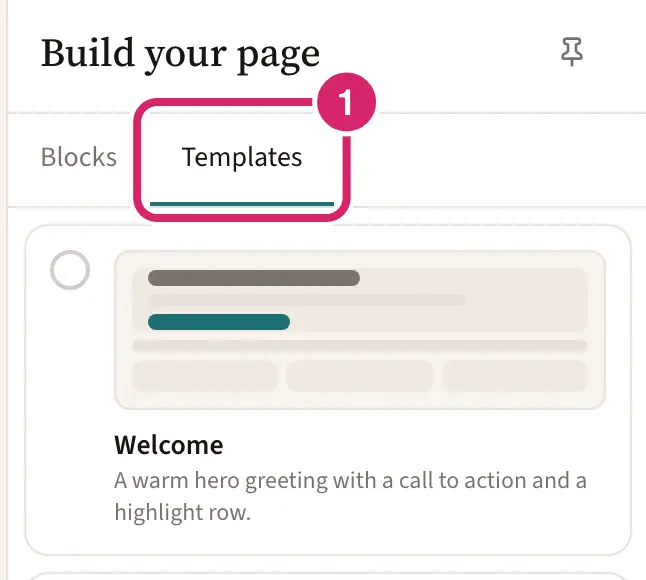
Select a template.
If the page already has content, select Replace page. Everything on the page is replaced. To change your mind, select Undo in the message that appears straight after.
Only your draft changes. Readers keep seeing the published page until you publish.
Choose blocks for each page
The Blocks tab groups its blocks like this list. Click a block to add it, or drag it onto the page. To find one quickly, type in Find a block….
Layout: 2 columns and 3 columns, to put things side by side, such as where you meet beside when.
Basic: Text, Heading 1 to Heading 4, Bulleted list, Numbered list, Quote, Code sample and Divider. These are the words on every page.
Sections: Hero, Callout, Colored section, Stats, Button, Button group, Row of cards, Image and text, Section divider, Pull-quote, Image, Gallery, Sponsor strip, Collapsible section, Video and Table. Use them on pages that have to catch the eye, such as your home page.
Features: Member directory, Member map, Calendar, Files, Event, Join request, Newsletter archive and Social links. These show live information from your club, so they stay up to date on their own.
Which blocks suit which page?
Some ideas to start from. Every club is different, so use whatever reads best for yours.
Home page: a Hero with a button, a Row of cards of what your club does, and an Event block set to Upcoming events so people see what's next.
About us: Image and text for your story, a Gallery of club photos, and a Pull-quote from a member.
Events: Event blocks on a public page; a Calendar on a members' page.
Join us: a Join request block, and a Collapsible section for the questions new people ask. Visitors see the join form only while People can ask to join is on.
Contact: Social links and a few lines of Text.
Members' pages: Member directory, Member map, Files and Newsletter archive. Keep them on members-only pages: visitors never see them anyway.
Write questions and answers with a Collapsible section
A Collapsible section shows a question that readers open to see its answer, so a page of questions stays short and easy to scan. Add one for each question.
In Blocks, click Collapsible section, under Sections. The editor shows it open, with the note Readers see this closed until they open it.
Type the question on its first line.
Press Enter at the end of the question. You move straight to the answer below it.
Type the answer. Press Shift+Enter for a line break inside a paragraph, or Enter to start a new paragraph.
Enter in the middle of a question does nothing, so a question never splits in two. For the next question, add another Collapsible section.
Live blocks
Calendar shows your club's calendars. Event shows one event; choose its Layout: Compact, Featured, or Upcoming events for the next few.
Files lists one folder of your club's files, or shows one file.
Member directory and Member map show your club's members.
Newsletter archive lists your club's past newsletters, newest first and grouped by year. A new issue appears on its own. The block is hidden while Newsletters is turned off for your club.
Join request is the form people use to ask to join. In its settings, Message above the button sets the line above its button; leave it empty to show only the button. Social links shows your club's social accounts.
Add photos to a page
When you add a photo anywhere on your website, such as in an Image block, a Hero or the Sharing image in Page settings, we make a large photo smaller before it uploads, so your pages load quickly for visitors, even on a phone. The photo chooser reminds you: PNG, JPEG, GIF or WebP. Large photos are resized for the web; animated GIFs are kept as they are, up to 15 MB.
Describe each photo for people who use a screen reader. Once you choose a photo, fill in Screen-reader description in the block's settings. If the photo is only decoration, select Decorative photo instead. A photo with no description is listed as unfinished when you publish.
A photo wider or taller than 3840 pixels is resized so its longest side is 3840 pixels. That's still sharp on the largest screens. A smaller photo uploads exactly as it is.
Animated GIFs are never resized, so they keep moving. A GIF can be up to 15 MB. If yours is bigger, make it shorter or smaller, then add it again.
iPhone photos saved as HEIC can't be prepared in a web browser. Save the photo as a JPEG and add it again. To have your iPhone take JPEG photos from now on, open its Settings › Camera › Formats and choose Most Compatible.
Undo a change
Select Undo or Redo at the top of the editor, or press Ctrl+Z (Command+Z on a Mac) to step back and Ctrl+Shift+Z (Command+Shift+Z) to step forward. When you remove a block, a message such as Image removed. offers Undo for at least 10 seconds.
Discard unpublished changes, in More options, throws away your draft and returns the page to its last published state.
Page history, the clock in the page's corner, keeps the last 50 published versions. Pick a version, select Restore this version, then Replace draft. Publish the draft to put that version live again. The page keeps its current address.
Delete page, the trash can in the page's top-right corner or in More options, moves a page to the trash, where you can restore it for 90 days. You can't delete your home page, or a page that still has pages under it: move or delete those first.
If something goes wrong
Your changes are not saved yet. Someone saved this page first, in another tab, on another device or as another person. Select Load the latest version. Your changes are kept on this device, so nothing is lost.
Move or delete this page’s sub-pages first. You tried to delete a page that has pages under it. Move or delete those pages first, then delete it.
That no longer exists. It may have been deleted somewhere else. Refresh and try again. Someone deleted what you were working on. Refresh the page.
Another page already uses this address. Choose another. Two pages can't share a web address. Pick a different one in Page settings.
This is an iPhone HEIC photo, which can’t be prepared in your browser. Save it as a JPEG (or set the iPhone camera to Most Compatible), then add it again. The photo is in the format an iPhone uses by default. Save it as a JPEG and add it again. Add photos to a page, above, shows how to make your iPhone take JPEG photos.
You can't see Add page or Edit page. The pencil appears only on a computer or tablet, and both need a role that can edit pages. If no pages appear at all, an admin may have turned off Web pages in Configuration › Club, under Features.